Showing posts with label homemade. Show all posts

Thursday, February 20, 2014

Homemade Coffee Creamer!

Ahhh.....I love milk day. Its no secret that I'm madly in love with the raw milk that I get for my family from our herd shares. I know that I am providing my family with the best of the best ingredients as well as its just such a great feeling to know where our food comes from.

Now the milk is of course a HUGE benefit of the you know...milk. But because we get raw, non-homogenized milk, then we also get the delicious cream that collects on the top. This is a MASSIVE bonus for us. I am able to make all kinds of delectable items out of this heavenly cream. You all know of my butter and Ice Cream making which I am able to make with the heavy cream but I also whip up a batch of vanilla coffee creamer for the hubs every week. He does like his coffee with cream in it. And to be honest.....I love it in my tea to make a London Fog.

Its sooooo easy to make and cost effective. AND I really do love the flavor ;-)

Homemade Vanilla Coffee Creamer

You will need:


  • 1 pint of organic Half and Half
OR
  • 1 cup of Heavy Cream (preferable raw)
  • 1 cup of Whole Milk (I use Raw of course)
  • 4 Tbsp of pure Maple syrup
  • 1 Tbsp of homemade or store bought Vanilla extract
Preparation:

1.) Add all ingredients to your jar.


2.) Put lid on and Shake your jar.


3.) Label. And DONE!!! Ridiculous easy right?!?!


Now...go pour yourself a cup of piping hot coffee.....or in my case steaming cup of earl gray tea. Pour in some of this. Sip that creamy deliciousness that is homemade goodness. <3 <3 <3

Monday, February 17, 2014

My husbands "other woman"


I know  I know....

Its not what you think. My husband loves me more than words can properly express. And I am so in love with him. But he does have a second love. This is the love of Craft Beer. I'm not talking the beer flavored water you buy at the grocery store that has commercials during your Super Bowl. I'm talking the dark, Hoppiest of Hoppy, Beer.

And to really push that love into a full blown obsession: he brews his beer as well. A few years back, my dad had asked if he would be interested in starting to brew as he was going to start. So for Christmas they both received gifts of Home Brew Kits.

Like mad scientists, they research different grains and malts. All different kinds of recipes and brew shops. While my dad likes the darker, Stout kind of beer. Greg prefers the hoppy IPA or I refer to as stinky beer.


I'm not going to lie. I do love it when he brews. The house starts smelling of warm hops and grains. Reminds me of warm grape nuts cereal. You can tell he really really enjoys it. And I love watching him get such pleasure out of this process.


He carefully measures out each ingredient using my kitchen scale. Making sure to sterilize everything before and after as he goes. Listening to Tool or A Perfect Circle on the computer while following his chosen recipe. As I get so passionate about my baking or homesteading, he gets just as passionate about his brew.


After a few days I will watch him go lovingly check on his "carboy" as it starts to ferment and bubble. Checking on it every few days. And then he will switch to a second ferment and then bottle. About six weeks in, he will crack open that first bottle with baited breath. Listening for that tell tale sound of properly carbonated beer.

He will take that first sip and a sense of appreciation and pride with wash over his face and I will be proud of him as well. I'm ok with this "other woman" I guess. Just as long as promises to brew me a Pale Ale ;-)

Friday, January 31, 2014

Oh the sweet victory that is Homemade Ice Cream


If there is one thing our family goes through lightning fast, its ice cream. It first started with Greg who was already pretty addicted to it. Almost every night, he would sit down on the sofa, while the stupid cat looked on hungrily, gulping down his night time bowl of store bought vanilla ice cream. Then the girls got wind of this creamy bowl of heaven and it seemed an epidemic had begun in the Trupp Homestead.

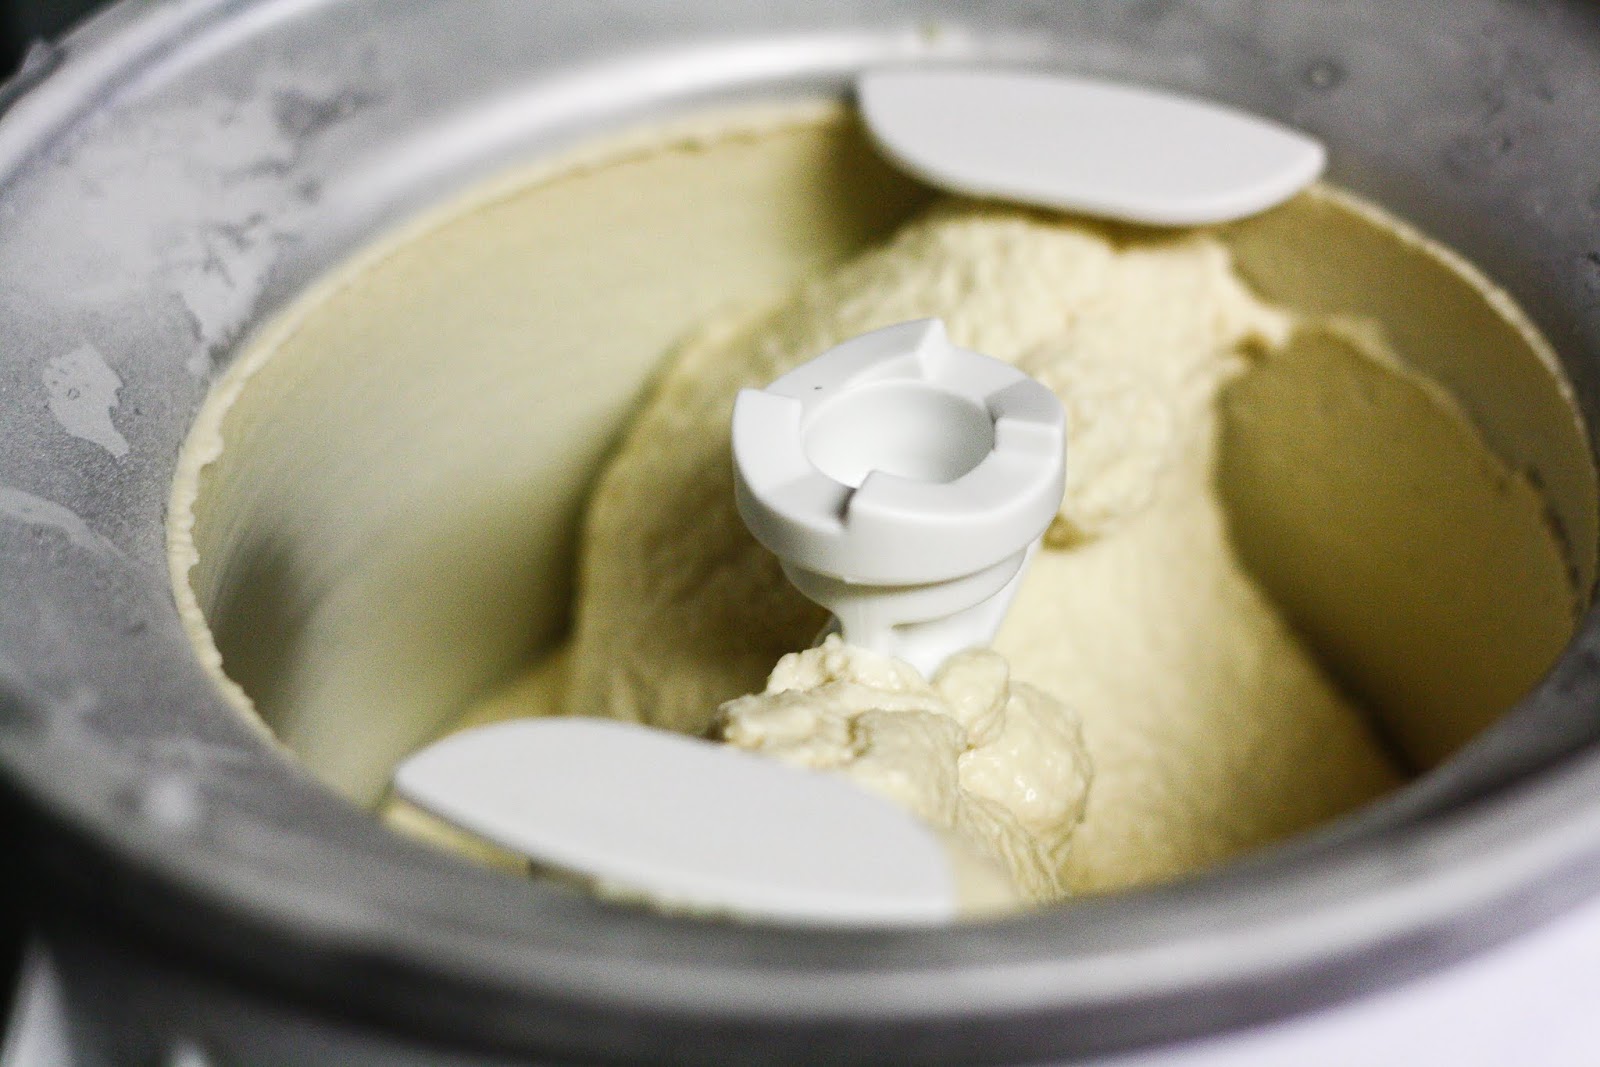
Since we had already begun transitioning to homemade/from scratch food, naturally an ice cream maker was top on my wish list. A couple of Christmases ago, I received it. Opening up the beautiful box to see my Kitchen aid Ice Cream Maker attachment, I knew that this would become a main appliance in the household along side such things as the refrigerator and oven. And then when I started making ice cream it was confirmed.

I have made this recipe so many times, now, that I don't even have to look it up anymore. I usually make it once a week with my weekly butter and bread recipes. Luckily it only requires a few steps and then the Kitchen aid does most of the work. And the flavor possibilities are endless!

Homemade Ice Cream

You will need:


  • 2 Cups Heavy Cream
  • 1 Cup of milk
  • 3/4 cups of sugar
  • 1 tbsp. of flavoring of choice (we are personally on a Coffee flavored kick so I've been adding Coffee Extract)
Preparation


1.) Mix all ingredients in a bowl thoroughly. The original recipe advised warming the cream and milk with the sugar until sugar has dissolved but I have never done that and never had a problem.

2.) Add to your Ice cream maker and follow manufacturers directions. I LOVE my kitchen aid attachment and advise anyone who has a kitchen aid to get this little baby.


3.) After all is mixed in, turn on and walk away. Let that bad boy do its work. Once you open it up and taste that sweet soft serve, your heart will melt. And let me tell you, You all know I am a Raw Milk junky. But if you can get your hands on some DO IT!! Makes the creamiest, sweetest ice cream you have ever tasted.


That is it!! Now I have made so many different combinations using this recipe. Vanilla: Just switch out the coffee extract for vanilla extract. Peppermint Stick: Use Vanilla but add some crushed peppermint candies to it. I made my dad Blackberry Ice Cream by adding the vanilla plus a couple cups of blackberries that I had saved from the summer harvest. Just play around with it! Oh and don't forget to share your recipe ;-)

Tuesday, January 21, 2014

The smell of Fresh Clean Clothes....

YAY for LAUNDRY!!! Ok not really but its a necessary evil that must be had. And in our house...it must be had A LOT. Oh the days when laundry was just a couple of loads on the weekend. HA! Then two little bundles later and we've got a load every couple days and with a potty training toddler??? Forget about it! And that stuff adds up after awhile! So to combat, at least part of the necessary evil, I make my own laundry detergent and fabric softener sheets.

I will, in the future, do a post on laundry detergent, I promise. I just have a ton left BUT I did run out of softener sheets the other day so that means another batch! Now I used to do the whole "downy ball filled with vinegar" for a while. But I really missed the smell of fresh clean clothes. I love opening up the dryer and getting that warm burst of freshly cleaned clothes hit me in the soul. Such a greatness. So I was on the hunt. And low and behold......I found it!

Homemade Reusable Fabric Softener Sheets

You will need:


  • Purified Water
  • Fabric Softener of your liking (I REALLY love the Mrs. Meyers Lavender)
  • Strips of cloth (I use old cloth baby wipes I had previously made)
  • Measuring spoons

Preparation


1.) You are going to want to use a plastic container to store them in. I used and old yogurt container for mine. Measure out 4 Tbsp of fabric softener to every 10 Tbsp of water. I usually double the batch. Mix it up really well.


2.) Add your pieces of cloth. I usually put on the lid and give it a few good shakes. Now that is it! Super easy right?!?

Just add one of these to your load in the dryer as you would a regular disposable one. After the laundry is done drying, you can technically use it for another load. Then just add to your wash again! Clothes smelling Lovely again!!

Friday, January 17, 2014

Mmmm.....Butter.


*sigh* I love butter. And I mean I REALLY love butter. That and bread. Two of my most favorite things in the food world. We go through a lot of butter in our house. And over time we have turned, slightly, into butter snobs. It's not mistake that you will see two different butter dishes on our counter. They both hold two completely separate butters. We have a regular vintage pyrex (I LOVE vintage pyrex) with organic, store bought, unsalted butter. We call this our "Cooking Butter". And then we have a butter bell to keep fresh our "Eating butter". Because, as much as I would love to be able to have an unlimited supply of fresh, homemade, grassfed, pastured butter, It just isn't in the cards right now. At least not until we are able to buy our very own dairy cow. Ah....dreams.

So What I'm going to do until then is skim the delicious heavy cream that comes on the top of my Raw milk every week and make this our eating butter. Butter really isn't that difficult to make. And you don't even really need to have raw milk (though I highly recommend it) to make it. Nor a butter churn ;-). But that would be super cute right?!

Homemade Butter

You will need:


  • 2 Cups Heavy Cream
  • 1/2 tsp Salt (or to taste)
Preparation


1.) Take your cream and salt and throw in your stand mixer with whisk attachment OR food processer. Yes you can do it by hand but its going to take an awful long time.


  2.) Now cover with towel. This is important. Purely for your kitchen cleanliness. Turn your mixer on high. First the cream is going to start to whip into whipping cream and then it will, slowly, start to separate. It will seem like its taking forever but I promise you its worth the wait. I usually am cleaning up around the kitchen while this is going. Once it starts to sound a lot like splashing in there, its probably done.


3.) Lift up your towel and look at the glorious little specks of butter in your bowl. SOOOO EXCITING!!  Drain out your butter milk into a bowl and reserve for pancakes or waffles later on. SUPER tasty. Make sure you use it within 3 days though.
 
 
4.) Now, this is important, you are going to want to rinse out your butter under cold water as best you can. I usually squeeze it through my fingers trying to squeeze out as much butter milk as I can. If this is not done, your butter will turn rancid pretty quickly. Once the water runs clear, you are done!!
 
Now take your HOMEMADE BUTTER and smear it on some freshly made toast and enjoy!


Tuesday, January 14, 2014

Elderberry Syrup or "Medicine" to the girls

Well cold and flu season is upon us and while, I'm not completely against the flu vaccine (as of yet) I am apposed to pumping full of store-bought drugs. Most of them come with unwanted dyes and chemicals. Completely foreign to the body. And how many times are you able to buy a medicine for ONE symptom?

I prefer to try and prevent instead of over medicate. Of course that means lots of fruits and vegetables and homemade chicken and beef stock. But also that means a daily dose of Elderberry Syrup. Now Black Elderberries, (also known as sambucus nigra), used for healing properties have been around for a long long time. Studies have shown that they contain high levels of vitamins A, B and C and really give your immune system boost. Also....side note: Hershel from Walking Dead used it to help cure the deadly flu going around and if its good enough for Darryl Dixon then its good enough for my family. JUST KIDDING! But seriously....this stuff is awesome.

Most health food and vitamins supply shops carry Elderberry syrup and it is marked to a Premium! When we first started using it, I was able to find a very small bottle for close to $10. Since both kids were sick, we blew threw that stuff in 1 day. So, after doing some research, I found a recipe which I follow and has worked beautifully. The girls love the taste (BONUS!!!) and we are able to attack the when the slightest sniffle comes rearing its ugly head!

So without further adieu....

Elderberry Syrup

You will need:


  • 2/3 cup of dried Black Elderberries (a lot of health food stores carry these and you can also order them online of course)
  • 3 1/2 cups of filtered water
  • 2 Tbls of dried or fresh Ginger (I always have fresh ginger that I keep in my freezer. Its stays fresh longer and makes it easier to grate)
  • 1 tsp Cinnamon
  • 1/2 cloves
  • 1 cup of raw LOCAL honey

Preparation:


1.) Pour all ingredients EXCEPT HONEY into a pot and place on stove and bring to a boil. Once a mixture has been brought to a boil, reduce to simmer and cover. Continue to cook for 45 minutes. This will reduce the syrup down to about half.


2.) After 45 minutes, remove from heat and pour through a fine strainer into a glass bowl or jar. I usually lightly push on the berries to squeeze out as much juice as I can. Throw away used berries or you add to your compost pile. Now Let the mixture cool a bit to room temperature.  Once it has cooled you can now add your honey. ( I once did it before hand and syrup got SUPER thick....like molasses thick. Complete waste. So make sure its cooled off a bit before adding honey).


3.) Once all your honey is mixed in you may now add it to your jar. I have found that it fits perfectly into one of my larger Mason Jars.


4.) Now I always write out instructions (for the hubs) and tape it to the jar. That way I'm not getting constant questions on how much needs to be used. But its pretty simple. Kids = 1/2 - 1 tsp a day or every 2-3 hours when sick until symptoms subside. Adults = 1/2 - 1 Tbls a day or every 2-3 hours when sick until symptoms subside. Store in the fridge for up to 6 months.

That's it!! Easy peasy if you ask me and WAYYYYY cheaper than constantly buying it. I can also say this stuff has worked beautifully for our family. You should give it a try ;-)

Sunday, January 12, 2014

The Great "Health or Taste" Debate


If there's one thing you know about me its that I love good food! I've always liked the way my "Papa" always said it: "I like the taste of food". Its true. Is there anything better than sitting down after a really great meal and feeling completely blown over and satisfied? no I don't think so. And I don't think that the taste of food should diminish because you want to be more conscious of food. I think if anything....it gets better.

People have this big misconception that more conscious means flax burger and soy milk. Green seaweed drinks and quinoa loafs. I'm sure those things are all nice and tasty but not something that I'm willing to subject my family too. At least not yet. ;-). It also doesn't mean you have to pay an arm and a leg for it either. We are a one income household. Penny pinching is the name of the game here. And I'm not going to let my families health decline to do so. It just takes a little bit more work. But since I'm now a SAHM...I feel that this is part of my job now.

So these are things I do to achieve both:

1.) Become a "Locavore":  No this isn't a crazy dinosaur....though my two year old would be ok with that. This means try to purchase local. Go to farmers markets. Support your local businesses. Support your local economy. I've learned that just doing a little research on the internet can go a long way. I've found great little family farm stands and shops. And a great thing about this is not only are you going to the source for your food but these farmers talk! So if you can't seem to find something just ask and a lot of times they can point you in the right direction. Multitasking!!

2.) Buy in bulk.  Most of the money you shell out when purchasing a certain product is gone towards packaging and handling. For example: Meat. Today was meat day in the homestead. Now normally we purchase 1/4 side of beef and 1/2 hog a year but being we are still pretty new to the area, we haven't gotten to really picking out a new farm. Sooooo I found a butcher shop in the mean time. Yes THEY STILL DO EXIST. And I promise you 9 times out of 10 the cuts are better and better price. So on Friday, Beanie and I went to the butcher to purchase our meat supply for the next couple months. I purchase 3 whole chickens (learn to break down a chicken. I will have a post about how this is done in the future. But really I promise its not that intimidating and you save a ton of money in the long run. Plus there is less waste), 1 GINORMOUS pork loin, and 4 steaks. And yes this means a little work involved. I roasted one of the chickens on Friday and we had leftover meat for Saturday night nachos PLUS carcass to make chicken stock. Today I broke down the other two chickens and got 2 packages of boneless breasts and 2 packages of legs and wings. That's 6 meals of chicken plus more bones for stock. The steaks were packaged into 2 packages of 2. And the Loin was made into 4 packages of chops, 1 whole pork roast which will probably last us at least 3 meals, and I ground some to make 2 packages of sausage. A little work but the meat will last us a while and I'm still supporting local economy.

3.) READ YOUR INGREDIENTS  I can't stress this enough. My rule of thumb is....If I can't pronounce it, I'm not eating it. I also follow the "5 ingredients or less rule." Chances are those two things save your money and your health.


4.) Produce what you can from home. Plant a garden for vegetables and produce. Build a chicken coop for eggs. Learn to make bread. Did you know you can make bread from just a few simple ingredients and NO KNEADING?!!? I'll do a post on this recipe soon. But YEAH! Its possible. And it tastes SOOOOO much better and costs just pennies. The more things you can produce from home, the better. They taste better and usually costs way less.

5.) Purchase whole foods. I'm not saying shop at Whole Foods (though if you can afford it or swing it than great!) but we don't have one close or the pocket book. This means vegetables, meat, nuts, grains, etc. I read somewhere that if you stick to the outer part of the grocery store than you are golden. ITS TRUE!! This is where most of the real foods are. Produce, Meat, Dairy...these are all around the edges of the store.

Obviously there are exceptions to every rule. You have to do what is best for you and your family. And I'm not saying I am all knowing. These are just some guidelines that we follow and has helped us in the end. I have been able to slowly widdle out most of our processed items in our pantry and fridge and didn't break the bank doing so. Plus I still make tasty treats for my family.


Saturday, January 11, 2014

Flour Tortillas....AKA homage to my childhood

Do you have a certain food that as soon as you take a bite, you are thrown into a memory? I do and its fresh tortillas. And I'm not talking the ones that you buy at the store in the plastic zip bag. I'm talking fresh off the pan, warm and buttery flour tortillas.

These special little discs of dough remind me of being a little girl and visiting my Great Grandma. She was this little Mexican woman no taller that 5 ft. Handkerchief in hair and apron on she would shuffle to the fridge and pull out a couple balls of dough. Hand roll them out with a pipe that my Grandpa Ernie had fashioned for her at work. Nothing made me happier than seeing that plate of fresh tortillas.

Sadly, I never learned to make them as a child. So I took to the interwebz for inspiration and direction. Years and years of trial and error and horribly misshapen and bad tasting tortillas were bestowed on my poor family. And then I stumbled onto it. The recipe. The Pioneer Woman had the closest recipe that I had seen. I still do some tweeking to it but I have found what seems to work best for me.  Now I know what you all are thinking: "this is NOT organic/nutritious". Agreed. But there are some things you just don't mess with. I like Lard in my tortillas. Its the only way to make them if you ask me. You try it out and let me know what you think!


Flour Tortillas

Ingredients


  • 2-1/2 cups All-purpose Flour
  • 2-1/2 teaspoons Baking Powder
  • 1 teaspoon Kosher Salt
  • 1/2 cup Lard Or Vegetable Shortening (Please don't use Vegetable Shortening. Its insulting to the tortillas)
  • 1 cup Hot Water

Preparation Instructions


1.)  Combine flour, baking powder and salt in a large wooden bowl. Stir together.


2.) Add spoonfuls of lard or shortening (use 1/2 cup) then use a pastry cutter to combine the ingredients. I doubled the recipe. That's why there are two hunks of Lard. We go through a ton of tortillas in my house. Cut mixture until it resembles coarse crumbs.


3.) Slowly pour in hot water, stirring to bring mixture together. I use my hands to do this. Slowly scooping and folding inward until all are incorporated. Lightly knead dough 30 to 40 times, or until it becomes a cohesive ball of dough and is less sticky. Cover with a tea towel and allow dough to rest. The original recipe says to let it rest for one hour but I never do. Mama's hungry!


4.) Roll into ping pong size balls, place on a tray. Again the recipe says to rest and I only let it go for about 5 minutes. Just long enough for me to line up my pans and get prepared to roll. I've never had a problem with this.


Now If you are so lucky to have really awesome Grandfather who works as a machinist and can fashion you a great tortilla roller than I highly recommend it. But if not, a regular rolling pin will work beautifully. But seriously.....get you a roller ;-)


5.) When you're ready to make the tortillas, heat a dark or cast iron griddle to medium/medium-high heat. One by one, roll out balls of dough until very, very thin.


6.) Throw tortillas (one by one) onto the griddle. Cook on each side for 20 to 30 seconds, removing while tortillas are still soft but slightly brown in spots. I find the brown spots give them the most awesome flavor. But try not to go overboard. Like.....don't burn them. Remove and stack tortillas, and cover with a towel to keep warm.

Now go get a pat of your favorite fresh butter and slather it on while still warm. Roll it up. Savor.