Friday, January 31, 2014

Oh the sweet victory that is Homemade Ice Cream


If there is one thing our family goes through lightning fast, its ice cream. It first started with Greg who was already pretty addicted to it. Almost every night, he would sit down on the sofa, while the stupid cat looked on hungrily, gulping down his night time bowl of store bought vanilla ice cream. Then the girls got wind of this creamy bowl of heaven and it seemed an epidemic had begun in the Trupp Homestead.

Since we had already begun transitioning to homemade/from scratch food, naturally an ice cream maker was top on my wish list. A couple of Christmases ago, I received it. Opening up the beautiful box to see my Kitchen aid Ice Cream Maker attachment, I knew that this would become a main appliance in the household along side such things as the refrigerator and oven. And then when I started making ice cream it was confirmed.

I have made this recipe so many times, now, that I don't even have to look it up anymore. I usually make it once a week with my weekly butter and bread recipes. Luckily it only requires a few steps and then the Kitchen aid does most of the work. And the flavor possibilities are endless!

Homemade Ice Cream

You will need:


  • 2 Cups Heavy Cream
  • 1 Cup of milk
  • 3/4 cups of sugar
  • 1 tbsp. of flavoring of choice (we are personally on a Coffee flavored kick so I've been adding Coffee Extract)
Preparation


1.) Mix all ingredients in a bowl thoroughly. The original recipe advised warming the cream and milk with the sugar until sugar has dissolved but I have never done that and never had a problem.

2.) Add to your Ice cream maker and follow manufacturers directions. I LOVE my kitchen aid attachment and advise anyone who has a kitchen aid to get this little baby.


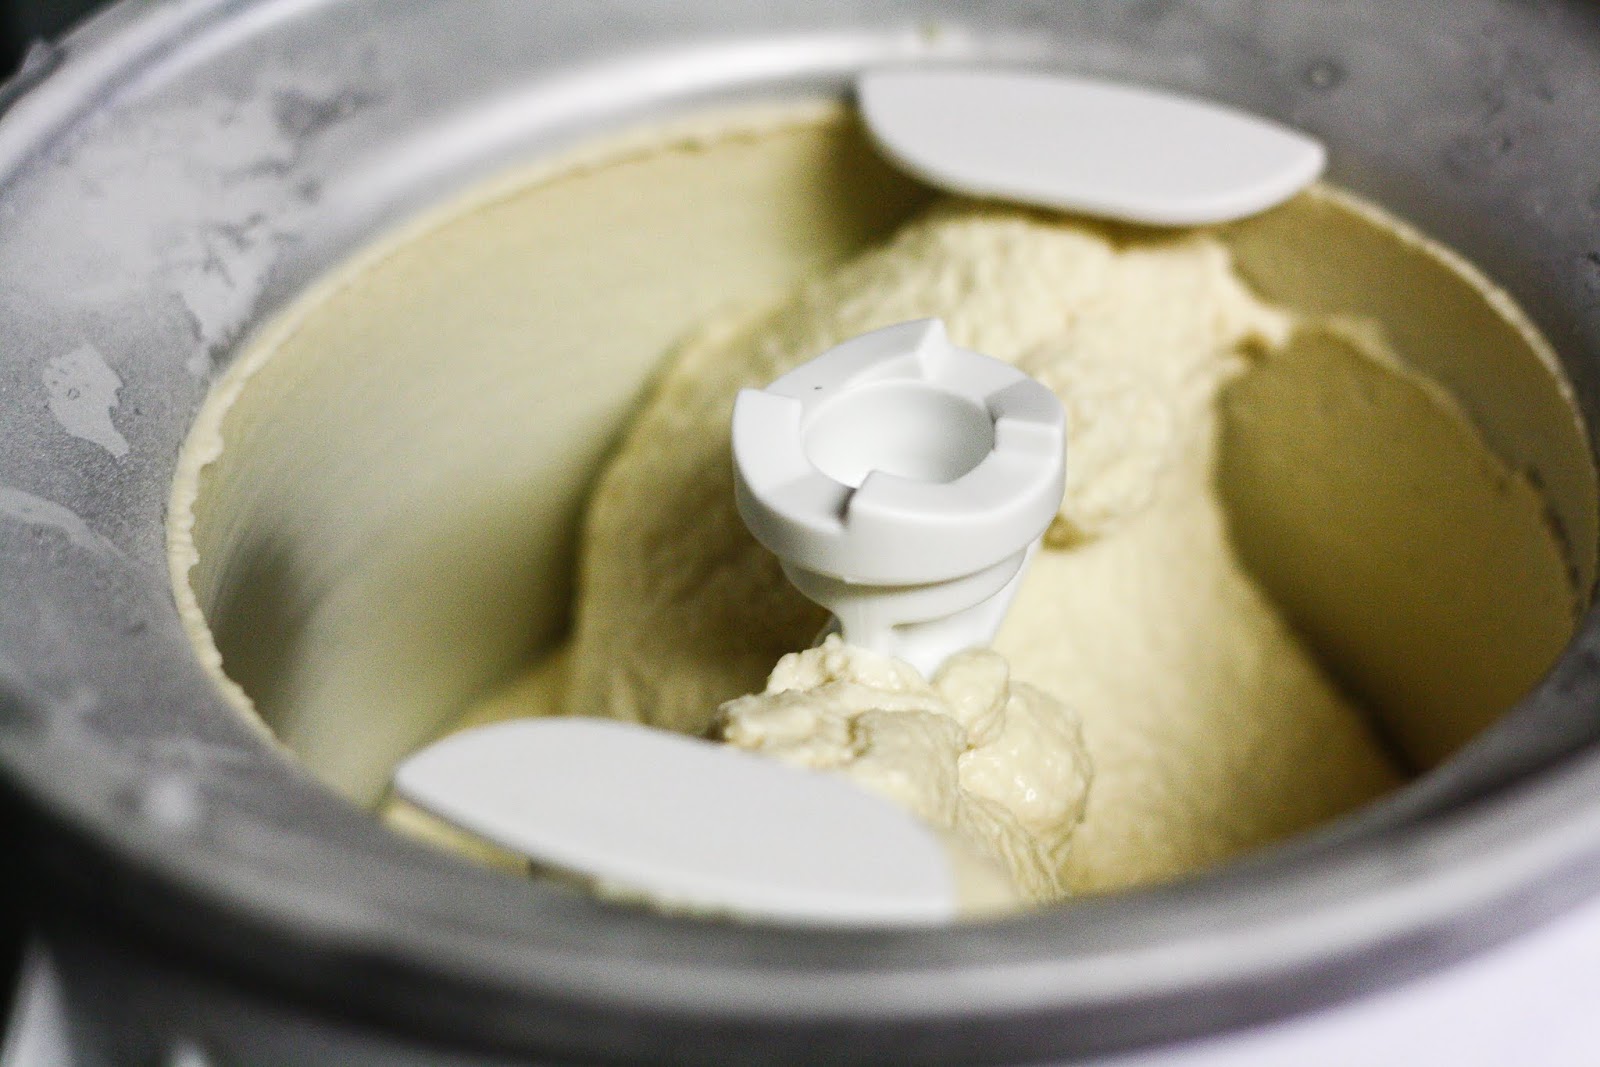
3.) After all is mixed in, turn on and walk away. Let that bad boy do its work. Once you open it up and taste that sweet soft serve, your heart will melt. And let me tell you, You all know I am a Raw Milk junky. But if you can get your hands on some DO IT!! Makes the creamiest, sweetest ice cream you have ever tasted.


That is it!! Now I have made so many different combinations using this recipe. Vanilla: Just switch out the coffee extract for vanilla extract. Peppermint Stick: Use Vanilla but add some crushed peppermint candies to it. I made my dad Blackberry Ice Cream by adding the vanilla plus a couple cups of blackberries that I had saved from the summer harvest. Just play around with it! Oh and don't forget to share your recipe ;-)

Wednesday, January 29, 2014

Maple Glazed Carrots!

Oh the battles of dinner table and children. I was blessed with two beautiful little girls who could not have more different eating styles if they tried. My Beanie will eat just about anything you put in front of her. Loves loves LOVES fruit and vegetables. Nothing stops this girl lol. My Sox.....well that's a different story. Sweet Sox refused to eat any solid food till after she turned a year old. I once spent a full day cooking and steaming and straining out homemade baby food for her. Only to have her gag every time it touched her lips. She still hates most fruit. And CAN NOT STAND Vegetables. Might I even say: She might take after her father?? lol. The one dish, it seems, they can both agree on is Maple glazed carrots.

It started as just a ploy to try and get her to eat her vegetables. I don't remember who started doing it but after cooking the carrots we would sprinkle some brown sugar on them. So tasty but sugar drenched. Then after a few years and a food overhaul, I started using real maple syrup to flavor most things that needed sweetening. HOLY HECK BATMAN! That sure did hit the nail on the head! These are super tasty, real food, AND cost effective! SOLD!!


Maple Glazed Carrots

You will need:


  • Real Maple Syrup
  • Fresh Carrots (I was able to get these BEAUTIFUL multicolored carrots from my farmstand store but any variety will work)
  • Butter

Preparation


1.) Add a couple tablespoons of butter to a pan and turn stove to medium-medium high.


2.) Add carrots and sauté for a good 5-10 minutes or so over medium-medium high heat. Just until slight al dente and cooked.


3.) Now this is purely up to taste. Pour in your maple syrup SLOWLY. You want them to be sweet but not overly. I usually add 1-2 tablespoons depending on how many carrots I have. It will start to bubble and cook up nicely. Roll your carrots around in the sugary love for a few minutes until nice and glazed.

That is it!! So simple and SOOOO tasty! My girls fight over these things and I don't feel overly bad for letting them have as many as they want. Make sure to sneak a couple extra before loading up your kids' plates....it will probably be all you get!

Monday, January 27, 2014

Time flies when you are having fun


It seems like yesterday when I brought home my first baby girl. I'll never forget those wide beautiful blue eyes looking up at me for the first time and all the amaze and wonderment of it all. And then just a couple short years later my second bundle of love came along. My sweet and wonderful "Bean". And while I yearn for the days when I'm not on constant alert for my little ones, times bring us right back to reality and I relish those sweet little snuggles.

Today was like any other morning with the hustle and bustle around the house. Up early and rushing about the house to get Sox off to preschool. Drop off went well and Bean and I returned home to do our normal morning time set up. I fixed her a hot breakfast of leftover baked French Toast that I had made over the weekend. Then after all was done shuffled her off to her room for a short show of "Little Einsteins" while I made butter and then vacuumed. Seems easiest to do these quick tasks while my ever so inquisitive Sox is in school for now. After butter making and vacuuming I told Beanie it was time to get dressed so we could go about our day and go get sister soon. I followed her into her room as she ran off and in slow motion it seemed, she tripped over her own feet in only the way two year olds do and face planted into the corner leg of her bed.

Now its funny but when things like this happen I get amazingly calm and collected. Strange as I always imagined myself freaking out in said situation but I don't. I picked up my now screaming toddler and wiped the blood from her nose and comforted her in the way only a mommy could. And as I sat there rocking her and hushing quietly to her it hit me. These are the moments that I will miss most. I had a big morning planned of making wonton wrappers and more organizing but at that moment none of that mattered. Because my baby NEEDED me. And she didn't want me to go. So I sat there rocking her. Closing my eyes and smelling her sweet hair. And trying so hard to imprint this moment into my memory so I will always have it.

It goes so fast. Too fast it seems. These times we have with our children. We find out that a new little bundle is coming. We bring that bundle home. And with a blink of an eye they are growing up and independent and you are fighting with them to just give you a quick hug. I'm already learning that now with my sweet Bean. Ahhh independence. Two is the year that we get to experience it lol. Potty training has been a test of patience that's for sure. But I love those sweet moments when time seems to stand still and we remember what it was like when they were babies. I know my babies are still young and I have so much to look forward to. But they are growing so fast and I can't help but try and pause to remember those rare moments when all they want to do is have you hold them. I'm registering my first baby for kindergarten this year. Before I know it, I will be attending my youngest baby's graduation. And at those moments, when I watch her cross that stage, with all the excitement and joy, I will still close my eyes and I remember those big beautiful blue eyes of my Sox looking up at me while tears of joy filled her daddy's eyes. I will remember that sweet smell of my Bean's hair and how at one time, she did not want me to let her go. And all will be perfect in my world.


Friday, January 24, 2014

Life....Sometimes


There are times when it feels like the world is your oyster. You are flying high and can touch the stars if you want. Everything seems to be in the right place and nobody and nothing is going to bring you down. And then there are other days. Days when whatever can go wrong, will go wrong. When all you want to do is rewind the day like an old VCR watching it in reverse until you are sleeping soundly awaiting your alarm to start the day fresh. Yep its been a couple of those these few days.

We were dealt with two Mega hits in a day this past week. Firstly, my husbands paycheck was a bit short as we hadn't calculated in the lost hours for a death in the family. Sure we have a little savings but we are trying to build that up again remember. No biggie right? We have food and meat so that will cover some costs lost until next paycheck. Well then there's the other. Nothing like coming home to a non-freezing freezer. Remember that post I did a couple weeks ago of our big meat purchase and buying bulk?? Yep that was it. Gone. I was able to salvage a couple chops and 1 package of chicken. But the rest was black and soft. It was a slow thaw. *sigh*. Such a waste. That's what bothered me the most. All is wasted. There was some venison in that freezer too from a dear friend that had rotted as well. Such a waste.

Now one can handle these one of two ways. Worry worry worry until you make yourself sick and you're snapping at all and everyone. OR. Drive on. Move onward and upward. Make lemon curd out of lemons. Or Chicken salad out of Chicken Sh*@ as my father would say. I feel this is the foundation of homesteading for me. Break away all the romantic thoughts of animals and fresh food and home. To me, Homesteading is making the most with what you have. So you AREN'T running to the stores. This will be tough as we definitely are a MEAT and potatoes kind of family, but its not impossible.
 
This also means being there for each other. A marriage works as a team. The family works as a team. When one is down, the other needs to pick up and be a rock. And to be honest...My husband is an amazing rock. No matter how down or worried I get, he is always there to remind me that "this too shall pass". Of course he says it super guy like fashion and in different words lol. But you get my drift. And when he is down, Its my turn to pull up my big girl panties and rock on. I know that these were two big blows for him. As a man, he wants to provide the best way possible for his family. And he does in more ways than he will ever know. But this is one time when I can utilize all those skills that I have been honing for the past couple years as a Stay At Home Mom and Future homesteader. Making as much as I can from scratch with just the pantry staples and whatever else we have. This is my way of "providing for my family". Its my way of being there for my husband. And being the best mommy and wife I can be.

Times are hard. But we are here for each other. And in the end. That's really all that matters. Being here for my children is the best thing I can do for them. I've been in the kitchen all morning making butter and yogurt and granola. Now I'm soaking and cooking beans for supper tonight. We have some bacon and we are going to make it last! Going to be nice for my husband to come home to a big bowl of hearty bean and bacon soup I think. That coupled with our girls' smiling faces and a nice clean(ish) house (lol I've got kids!! trying to clean with two children is like trying to brush your teeth with oreos!!), I think we will be alright :-)


Tuesday, January 21, 2014

The smell of Fresh Clean Clothes....

YAY for LAUNDRY!!! Ok not really but its a necessary evil that must be had. And in our house...it must be had A LOT. Oh the days when laundry was just a couple of loads on the weekend. HA! Then two little bundles later and we've got a load every couple days and with a potty training toddler??? Forget about it! And that stuff adds up after awhile! So to combat, at least part of the necessary evil, I make my own laundry detergent and fabric softener sheets.

I will, in the future, do a post on laundry detergent, I promise. I just have a ton left BUT I did run out of softener sheets the other day so that means another batch! Now I used to do the whole "downy ball filled with vinegar" for a while. But I really missed the smell of fresh clean clothes. I love opening up the dryer and getting that warm burst of freshly cleaned clothes hit me in the soul. Such a greatness. So I was on the hunt. And low and behold......I found it!

Homemade Reusable Fabric Softener Sheets

You will need:


  • Purified Water
  • Fabric Softener of your liking (I REALLY love the Mrs. Meyers Lavender)
  • Strips of cloth (I use old cloth baby wipes I had previously made)
  • Measuring spoons

Preparation


1.) You are going to want to use a plastic container to store them in. I used and old yogurt container for mine. Measure out 4 Tbsp of fabric softener to every 10 Tbsp of water. I usually double the batch. Mix it up really well.


2.) Add your pieces of cloth. I usually put on the lid and give it a few good shakes. Now that is it! Super easy right?!?

Just add one of these to your load in the dryer as you would a regular disposable one. After the laundry is done drying, you can technically use it for another load. Then just add to your wash again! Clothes smelling Lovely again!!

Monday, January 20, 2014

Thoughts on the past and future


There are few places that I can honestly say hold my heart. I've travelled most of my life so saying any place is "like home" is really a stretch. I can honestly say that Seattle, or more accurately, the Pacific Northwest, feels like home.

Last night was a big night for Seattle and my beloved Seahawks. As we lined ourselves up for Superbowl Sunday, I couldn't help but to get deeply saddened for not being there celebrating with all my friends. I miss all the evergreens and mist. The water (though I'm deeply scared of it) and the mountains. And of course my friends. It hasn't been easy for us this past couple years. We left Seattle and for good reason. We needed to be closer to family and create a better life for our children. Our house was incredibly small and we were steadily outgrowing it. I REALLY wanted to be able to have my children play outside if wanted and that just wasn't in the cards where we were living. Our house was extremely close to the main road and backed up to a grocery market. In "little mexico". When we bought it, we loved our house and its character. But, after having children, it just wasn't right for us. And it really played on my heart that my children were never around any family. Greg has only a few family members left but none that were a constant in the girls' life and I had really no body close. I do have a brother in Washington but he is in the military and always deployed. Bottom line....it needed to change. It is true......having children changes everything.


So we moved. We packed up and left. And I remember looking back at my city in the dark early hours as we drove away, with tears filling my eyes. I love that city. But it just wasn't right for us then. And honestly? It just isn't right for us now. I feel sometimes what you want is not necessarily what you need. And we need to be here. We are building such a foundation for our children of family and hard work. We can now have the time (and space) to do the things that we wanted for them. They have built such strong relationships with their grandparents and aunts. And especially now that their great grandparents are here. It was a great move. Hopefully, soon, we will be purchasing land to build our homestead and growing our farm. These are things that I remind myself of why we moved.

So I will always have my heart in the Pacific Northwest. And I know there will be times when I really just want to go back. But I know, someday I will return. Until then I will cheer from a far with my fellow Seahawks fans. Maybe I'll plant some blue and green flowers this year. :-)

Friday, January 17, 2014

Mmmm.....Butter.


*sigh* I love butter. And I mean I REALLY love butter. That and bread. Two of my most favorite things in the food world. We go through a lot of butter in our house. And over time we have turned, slightly, into butter snobs. It's not mistake that you will see two different butter dishes on our counter. They both hold two completely separate butters. We have a regular vintage pyrex (I LOVE vintage pyrex) with organic, store bought, unsalted butter. We call this our "Cooking Butter". And then we have a butter bell to keep fresh our "Eating butter". Because, as much as I would love to be able to have an unlimited supply of fresh, homemade, grassfed, pastured butter, It just isn't in the cards right now. At least not until we are able to buy our very own dairy cow. Ah....dreams.

So What I'm going to do until then is skim the delicious heavy cream that comes on the top of my Raw milk every week and make this our eating butter. Butter really isn't that difficult to make. And you don't even really need to have raw milk (though I highly recommend it) to make it. Nor a butter churn ;-). But that would be super cute right?!

Homemade Butter

You will need:


  • 2 Cups Heavy Cream
  • 1/2 tsp Salt (or to taste)
Preparation


1.) Take your cream and salt and throw in your stand mixer with whisk attachment OR food processer. Yes you can do it by hand but its going to take an awful long time.


  2.) Now cover with towel. This is important. Purely for your kitchen cleanliness. Turn your mixer on high. First the cream is going to start to whip into whipping cream and then it will, slowly, start to separate. It will seem like its taking forever but I promise you its worth the wait. I usually am cleaning up around the kitchen while this is going. Once it starts to sound a lot like splashing in there, its probably done.


3.) Lift up your towel and look at the glorious little specks of butter in your bowl. SOOOO EXCITING!!  Drain out your butter milk into a bowl and reserve for pancakes or waffles later on. SUPER tasty. Make sure you use it within 3 days though.
 
 
4.) Now, this is important, you are going to want to rinse out your butter under cold water as best you can. I usually squeeze it through my fingers trying to squeeze out as much butter milk as I can. If this is not done, your butter will turn rancid pretty quickly. Once the water runs clear, you are done!!
 
Now take your HOMEMADE BUTTER and smear it on some freshly made toast and enjoy!


Tuesday, January 14, 2014

Elderberry Syrup or "Medicine" to the girls

Well cold and flu season is upon us and while, I'm not completely against the flu vaccine (as of yet) I am apposed to pumping full of store-bought drugs. Most of them come with unwanted dyes and chemicals. Completely foreign to the body. And how many times are you able to buy a medicine for ONE symptom?

I prefer to try and prevent instead of over medicate. Of course that means lots of fruits and vegetables and homemade chicken and beef stock. But also that means a daily dose of Elderberry Syrup. Now Black Elderberries, (also known as sambucus nigra), used for healing properties have been around for a long long time. Studies have shown that they contain high levels of vitamins A, B and C and really give your immune system boost. Also....side note: Hershel from Walking Dead used it to help cure the deadly flu going around and if its good enough for Darryl Dixon then its good enough for my family. JUST KIDDING! But seriously....this stuff is awesome.

Most health food and vitamins supply shops carry Elderberry syrup and it is marked to a Premium! When we first started using it, I was able to find a very small bottle for close to $10. Since both kids were sick, we blew threw that stuff in 1 day. So, after doing some research, I found a recipe which I follow and has worked beautifully. The girls love the taste (BONUS!!!) and we are able to attack the when the slightest sniffle comes rearing its ugly head!

So without further adieu....

Elderberry Syrup

You will need:


  • 2/3 cup of dried Black Elderberries (a lot of health food stores carry these and you can also order them online of course)
  • 3 1/2 cups of filtered water
  • 2 Tbls of dried or fresh Ginger (I always have fresh ginger that I keep in my freezer. Its stays fresh longer and makes it easier to grate)
  • 1 tsp Cinnamon
  • 1/2 cloves
  • 1 cup of raw LOCAL honey

Preparation:


1.) Pour all ingredients EXCEPT HONEY into a pot and place on stove and bring to a boil. Once a mixture has been brought to a boil, reduce to simmer and cover. Continue to cook for 45 minutes. This will reduce the syrup down to about half.


2.) After 45 minutes, remove from heat and pour through a fine strainer into a glass bowl or jar. I usually lightly push on the berries to squeeze out as much juice as I can. Throw away used berries or you add to your compost pile. Now Let the mixture cool a bit to room temperature.  Once it has cooled you can now add your honey. ( I once did it before hand and syrup got SUPER thick....like molasses thick. Complete waste. So make sure its cooled off a bit before adding honey).


3.) Once all your honey is mixed in you may now add it to your jar. I have found that it fits perfectly into one of my larger Mason Jars.


4.) Now I always write out instructions (for the hubs) and tape it to the jar. That way I'm not getting constant questions on how much needs to be used. But its pretty simple. Kids = 1/2 - 1 tsp a day or every 2-3 hours when sick until symptoms subside. Adults = 1/2 - 1 Tbls a day or every 2-3 hours when sick until symptoms subside. Store in the fridge for up to 6 months.

That's it!! Easy peasy if you ask me and WAYYYYY cheaper than constantly buying it. I can also say this stuff has worked beautifully for our family. You should give it a try ;-)

Monday, January 13, 2014

2014 Goals


I had learned early on that New Years "Resolutions" usually don't make it past the first month before they are cast aside and forgotten about. I'm more inclined to call them goals. That way there is no pressure to have them done. More to have something to work towards. Then you feel so much more accomplished when you have completed them.

This year my goals are for both homesteading and personal. I like to stay well rounded and grounded.


2014 Goals
 
  1. Build Planters - We live in a rental house so are unable to build a real garden as we have pretty strict landlords :-/
  2. Plant Garden (Vegetables and Fruit) - in the planters of course
  3. Start Purchasing Raw Milk  YAY COMPLETE!!!!
  4. Make Dress - I'm always making things for the girls and others but I've never made anything really for myself. I've seen an idea of purchasing vintage sheets and making a dress. Really want to do this for the summer.
  5. Build a Chicken Coop (for the neighbors) -  We live in a rental house but have some pretty awesome neighbors who are willing to loan us some of the back land, when needed, for chickens in exchange for as many eggs as they want. So we are going to build a coop/tractor (for our neighbors chickens).
  6. Replace/Build Savings account - When we started out we owned a VERY Small house in Seattle. Then Sophie came and, shortly after, Beanie. We learned pretty quickly that not only did we need more family around but we were quickly out growing our house. Unfortunately, the economy didn't really seem to care about are situation so we ended up selling our house under short sale. We first drained our savings to move to Utah to be closer to one of my sisters but found out quickly it wasn't for us. So, again drained our account to move to Kentucky to be closer to my mother and family. This was the proper move for us but very costly in that we, again, we're stuck with no savings. So this is the year to put that back!
  7. Start Christmas Presents - Last year I waited WAY too long and was left scrambling at the end of the year. I always make our presents for family so this year I would like to get a head start.
  8. Make Kombucha - I've always heard this stuff is amazing for you. And I have found a flavor that I like at Kroger. So maybe this year is the year to start brewing it for myself? We'll see.
  9. Purchase Bow - This is for Greg. He has really shown interested in archery and hunting. And to be honest, having a freezer full of organic, FREE Meat, is mighty appealing. 
 
So those are my goals. Again both for Homesteading and personal. Not bad for already having completed one!
 
Yay for 2014!!

Sunday, January 12, 2014

The Great "Health or Taste" Debate


If there's one thing you know about me its that I love good food! I've always liked the way my "Papa" always said it: "I like the taste of food". Its true. Is there anything better than sitting down after a really great meal and feeling completely blown over and satisfied? no I don't think so. And I don't think that the taste of food should diminish because you want to be more conscious of food. I think if anything....it gets better.

People have this big misconception that more conscious means flax burger and soy milk. Green seaweed drinks and quinoa loafs. I'm sure those things are all nice and tasty but not something that I'm willing to subject my family too. At least not yet. ;-). It also doesn't mean you have to pay an arm and a leg for it either. We are a one income household. Penny pinching is the name of the game here. And I'm not going to let my families health decline to do so. It just takes a little bit more work. But since I'm now a SAHM...I feel that this is part of my job now.

So these are things I do to achieve both:

1.) Become a "Locavore":  No this isn't a crazy dinosaur....though my two year old would be ok with that. This means try to purchase local. Go to farmers markets. Support your local businesses. Support your local economy. I've learned that just doing a little research on the internet can go a long way. I've found great little family farm stands and shops. And a great thing about this is not only are you going to the source for your food but these farmers talk! So if you can't seem to find something just ask and a lot of times they can point you in the right direction. Multitasking!!

2.) Buy in bulk.  Most of the money you shell out when purchasing a certain product is gone towards packaging and handling. For example: Meat. Today was meat day in the homestead. Now normally we purchase 1/4 side of beef and 1/2 hog a year but being we are still pretty new to the area, we haven't gotten to really picking out a new farm. Sooooo I found a butcher shop in the mean time. Yes THEY STILL DO EXIST. And I promise you 9 times out of 10 the cuts are better and better price. So on Friday, Beanie and I went to the butcher to purchase our meat supply for the next couple months. I purchase 3 whole chickens (learn to break down a chicken. I will have a post about how this is done in the future. But really I promise its not that intimidating and you save a ton of money in the long run. Plus there is less waste), 1 GINORMOUS pork loin, and 4 steaks. And yes this means a little work involved. I roasted one of the chickens on Friday and we had leftover meat for Saturday night nachos PLUS carcass to make chicken stock. Today I broke down the other two chickens and got 2 packages of boneless breasts and 2 packages of legs and wings. That's 6 meals of chicken plus more bones for stock. The steaks were packaged into 2 packages of 2. And the Loin was made into 4 packages of chops, 1 whole pork roast which will probably last us at least 3 meals, and I ground some to make 2 packages of sausage. A little work but the meat will last us a while and I'm still supporting local economy.

3.) READ YOUR INGREDIENTS  I can't stress this enough. My rule of thumb is....If I can't pronounce it, I'm not eating it. I also follow the "5 ingredients or less rule." Chances are those two things save your money and your health.


4.) Produce what you can from home. Plant a garden for vegetables and produce. Build a chicken coop for eggs. Learn to make bread. Did you know you can make bread from just a few simple ingredients and NO KNEADING?!!? I'll do a post on this recipe soon. But YEAH! Its possible. And it tastes SOOOOO much better and costs just pennies. The more things you can produce from home, the better. They taste better and usually costs way less.

5.) Purchase whole foods. I'm not saying shop at Whole Foods (though if you can afford it or swing it than great!) but we don't have one close or the pocket book. This means vegetables, meat, nuts, grains, etc. I read somewhere that if you stick to the outer part of the grocery store than you are golden. ITS TRUE!! This is where most of the real foods are. Produce, Meat, Dairy...these are all around the edges of the store.

Obviously there are exceptions to every rule. You have to do what is best for you and your family. And I'm not saying I am all knowing. These are just some guidelines that we follow and has helped us in the end. I have been able to slowly widdle out most of our processed items in our pantry and fridge and didn't break the bank doing so. Plus I still make tasty treats for my family.


Saturday, January 11, 2014

Flour Tortillas....AKA homage to my childhood

Do you have a certain food that as soon as you take a bite, you are thrown into a memory? I do and its fresh tortillas. And I'm not talking the ones that you buy at the store in the plastic zip bag. I'm talking fresh off the pan, warm and buttery flour tortillas.

These special little discs of dough remind me of being a little girl and visiting my Great Grandma. She was this little Mexican woman no taller that 5 ft. Handkerchief in hair and apron on she would shuffle to the fridge and pull out a couple balls of dough. Hand roll them out with a pipe that my Grandpa Ernie had fashioned for her at work. Nothing made me happier than seeing that plate of fresh tortillas.

Sadly, I never learned to make them as a child. So I took to the interwebz for inspiration and direction. Years and years of trial and error and horribly misshapen and bad tasting tortillas were bestowed on my poor family. And then I stumbled onto it. The recipe. The Pioneer Woman had the closest recipe that I had seen. I still do some tweeking to it but I have found what seems to work best for me.  Now I know what you all are thinking: "this is NOT organic/nutritious". Agreed. But there are some things you just don't mess with. I like Lard in my tortillas. Its the only way to make them if you ask me. You try it out and let me know what you think!


Flour Tortillas

Ingredients


  • 2-1/2 cups All-purpose Flour
  • 2-1/2 teaspoons Baking Powder
  • 1 teaspoon Kosher Salt
  • 1/2 cup Lard Or Vegetable Shortening (Please don't use Vegetable Shortening. Its insulting to the tortillas)
  • 1 cup Hot Water

Preparation Instructions


1.)  Combine flour, baking powder and salt in a large wooden bowl. Stir together.


2.) Add spoonfuls of lard or shortening (use 1/2 cup) then use a pastry cutter to combine the ingredients. I doubled the recipe. That's why there are two hunks of Lard. We go through a ton of tortillas in my house. Cut mixture until it resembles coarse crumbs.


3.) Slowly pour in hot water, stirring to bring mixture together. I use my hands to do this. Slowly scooping and folding inward until all are incorporated. Lightly knead dough 30 to 40 times, or until it becomes a cohesive ball of dough and is less sticky. Cover with a tea towel and allow dough to rest. The original recipe says to let it rest for one hour but I never do. Mama's hungry!


4.) Roll into ping pong size balls, place on a tray. Again the recipe says to rest and I only let it go for about 5 minutes. Just long enough for me to line up my pans and get prepared to roll. I've never had a problem with this.


Now If you are so lucky to have really awesome Grandfather who works as a machinist and can fashion you a great tortilla roller than I highly recommend it. But if not, a regular rolling pin will work beautifully. But seriously.....get you a roller ;-)


5.) When you're ready to make the tortillas, heat a dark or cast iron griddle to medium/medium-high heat. One by one, roll out balls of dough until very, very thin.


6.) Throw tortillas (one by one) onto the griddle. Cook on each side for 20 to 30 seconds, removing while tortillas are still soft but slightly brown in spots. I find the brown spots give them the most awesome flavor. But try not to go overboard. Like.....don't burn them. Remove and stack tortillas, and cover with a towel to keep warm.

Now go get a pat of your favorite fresh butter and slather it on while still warm. Roll it up. Savor.


Introductions


When I had found I was pregnant with my first baby I was convinced that the "Working Mom" was the life style for me. Living in Seattle, "progressive working mothers" was the way of life.  Then that little bundle of blue eyed energy came into my life bringing a whole world of new feelings and emotions. Now I have always been a health conscience person of moderate affair and was blessed with the ability to go to culinary school to explore that……I’m getting off track. Let me start from the beginning. My name is Nikki and these are my crazy adventures of stay at home mom/homestead beginnings/complete transition for our family to local and homemade sustainable foods.

I have always been a self-described hippy at heart. Always in tune with nature and the healthy ways of sustainable lifestyle. Culinary school really solidified that for me in that I was able to taste and see the difference when incorporating local and natural ingredients. But when my two beautiful bouncing girls came into my life, first Sophia in the spring 2009 and then our early Little Bean or Lilith in the fall 2011, these principles really took on a new meaning for me. I began noticing I was reading labels more closely and asking where items came from. Now I’m not saying that I haven’t stepped foot in a grocery store since then. Times have been hard and to be honest: my babies gotta eat and I had to work. But over time and much contemplation, our family has found it best for me to be at home which affords me the time to really hone in on my skills of honest cooking and care.


I gave notice at my job and November 15 of 2013 was my last day of paperwork master. I can’t tell you how excited I am to be able to practice these principles I have grown to love. Teaching my children where our food comes from is so very important to me. We started our adventure, way back when, in Seattle, spent a short jaunt in Utah, and now live in Kentucky with amazing people and opportunity surrounding us. I truly think its a good fit. While we don’t have quite the food “selection”, per se, as we did in Seattle, we definitely have a different variety. And I’ve never been one to shy away from a good cooking challenge! And I hope to be able to share some these with you from time to time.